Deploying a classification model on AWS Lambda with Docker and FastAPI
Does the user inserted the correct picture when the app requested? That’s a pretty common problem companies faces when creating a onboarding process of a app or a web service. For example, during the onboarding process of a bank the app can ask for a selfie and the user insert a picture of it’s ID. Since in those kind of processes there’s a huge amount of requests at the same time, a manual validation process can’t be used and a machine learning model can be a good alternative. TensorFlow and FastAPI can be used to create that solution.
We need also to deploy the model on the cloud so it can be available to the app. For that, we can use the serverless service AWS Lambda since it has a low cost and we don’t need to worry about servers.
In this article a model will be created to classify ID’s/driver’s licenses photos, selfies and invalid photos using TensorFlow, then a API with FastAPI will be created, it’ll be containeraized with Docker and deployed on AWS Lambda. The full repository of the project can be checked here.
The data
For the model, three types of images are needed: photos of ID’s, selfies and images so called “invalid” ones.
For the ID’s photos we can use the BID Dataset[1]. It is a dataset with photos of brazilian driver’s licences and ID’s photos with fake data built by brazilian researchers. Below there’s a example of these images.
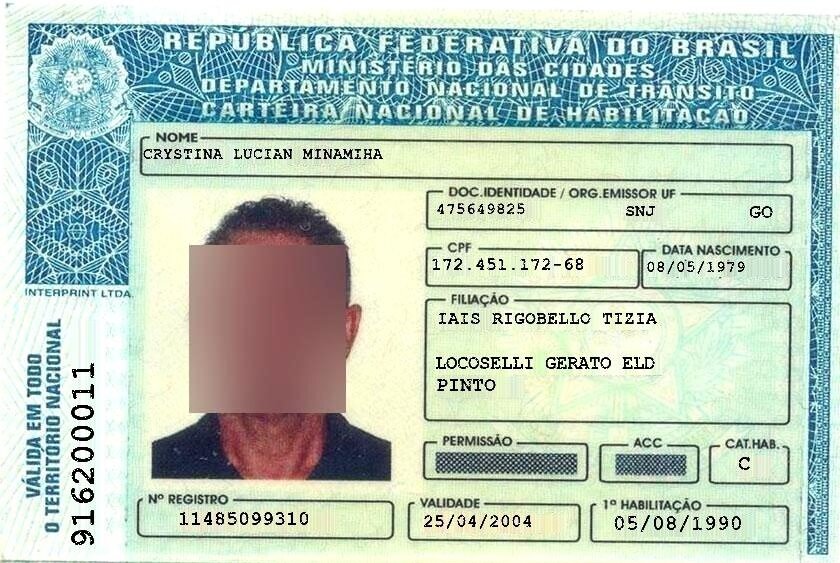
To download the dataset, we can use the following code on Google Colab:
For the selfies and invalid photos we can use the Selfie-Image-Detection-Dataset[2], which contains selfies and non-selfies/invalid photos. A example of a selfie

and of a invalid image
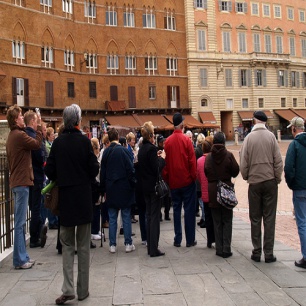
To download the dataset we can use the Kaggle API using the following code also in Google Colab:
We now have the full dataset. We can split 80% for the training dataset and the rest for the test dataset.
Data preparation and the model
We’ll use the images in black and white. Also, the photos to be in the same size. We can use Tensorflow to perform these transformations:
The model we’ll train to classify the images is a CNN (Convolutional Neural Network) since it can handle pretty well the task of classifition of images. The code of the model is
The output of the model is a vector with a score for each class. The softmax function can be used to transform these scores into probabilities. For each $z_{i}$ score of the $i$ class of the K classes, the softmax function can be written as:
We can now save the model using a method of the model class:
It will create a folder and it looks like this

The full code for training the model can be checked here.
Creating the API
To serve the model, we need to create an API and we’ll use FastAPI because it’s a fast and reliable library.
The overall structure of the project is the following:
We’ll explain all the files. The main.py file should look like
The classifier route is the one we’ll use to make the prediction. It recieves a dictionary containing two keys: the input_photo coded in base64 in a string format and the lead_id key to identification purposes. A example of the request in Python would be:
We can test the API by running it with uvicorn:
When the request in made, the function calls the predict function of the make_prediction.py file. The function decodes the image, turns it to grayscale, resizes it and call the model to make the prediction.
The function returns a object of the Prediction class and a hash of the image to be store in a database so we don’t need to classify the same image twice. The prediction class is built in the output.py file:
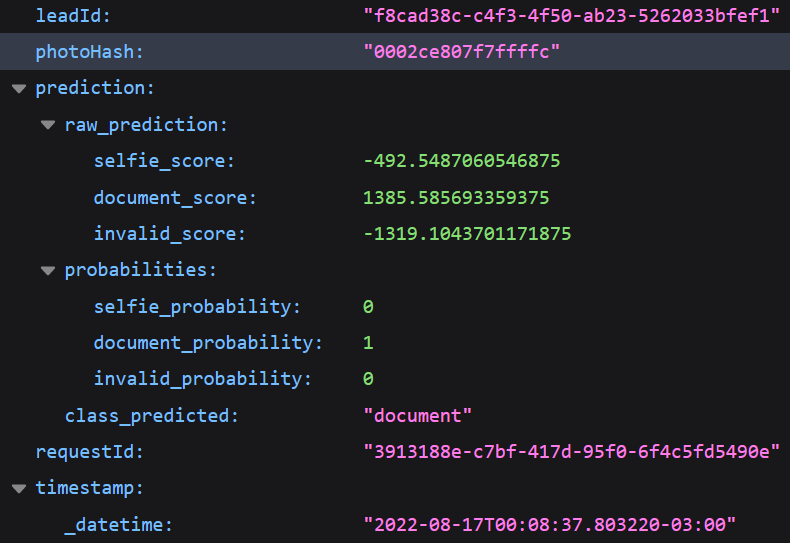
When the predict function returns the Prediction object, the classifier function of the main.py file combines the Predition object with the lead_id of the original request to build the OutputPrediction object. A response would be:
For dependencies management Poetry can be used. It’s a package in Python similar to pip. In the root folder we can write
It’ll create a pyproject.toml file, where the details of the project can be written. The full file is
With that we can install the API as a python package:
In order to deploy on AWS Lambda, we need to create the lambda_function.py file in the root of the projects. It simply loads the app object of the main.py and calls the Mangum library.
And that’s it for the API.
Deploying the API
With API ready, we can now containerize the with Docker. We’ll be using the AWS version of Linux on the Docker container. On the Dockerfile we should write:
This implementation is based on the tutorial by AWS[3]. The LAMBDA_TASK_ROOT is a variable with the value /var/task.
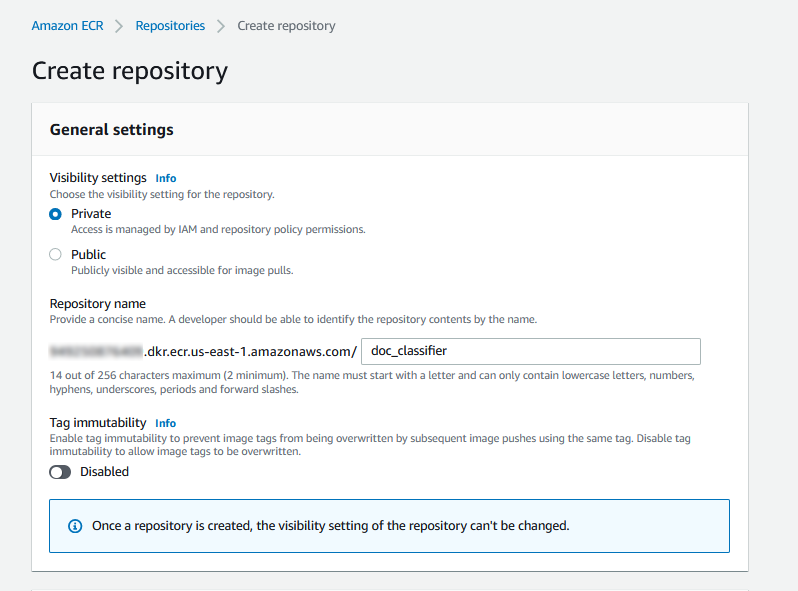
Before creating the container, a repository in the AWS ECR (Elastic Container Registry) is needed. It can be created on AWS managment tool, searching for ECR, clicking in “create repository” and filling the informations needed.
Following Cardoso’s tutorial[4], the container can be created by tipyng
Tagging the image:
Give permission to your CLI to access ECR: [https://docs.aws.amazon.com/lambda/latest/dg/images-create.html]
Pushing it to the repository:
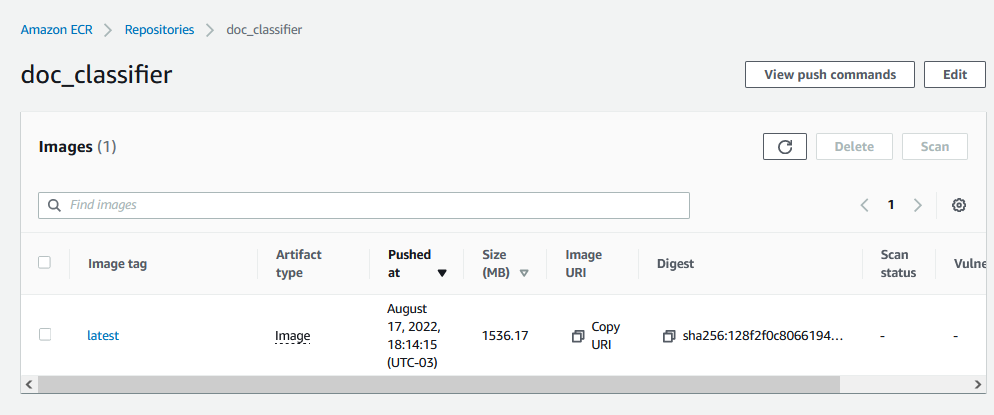
We can know see the image in ECR:
The Lambda function can now be created. Searching for “Lambda” in the AWS search bar and clicking in “create function”, the following screen should apper:
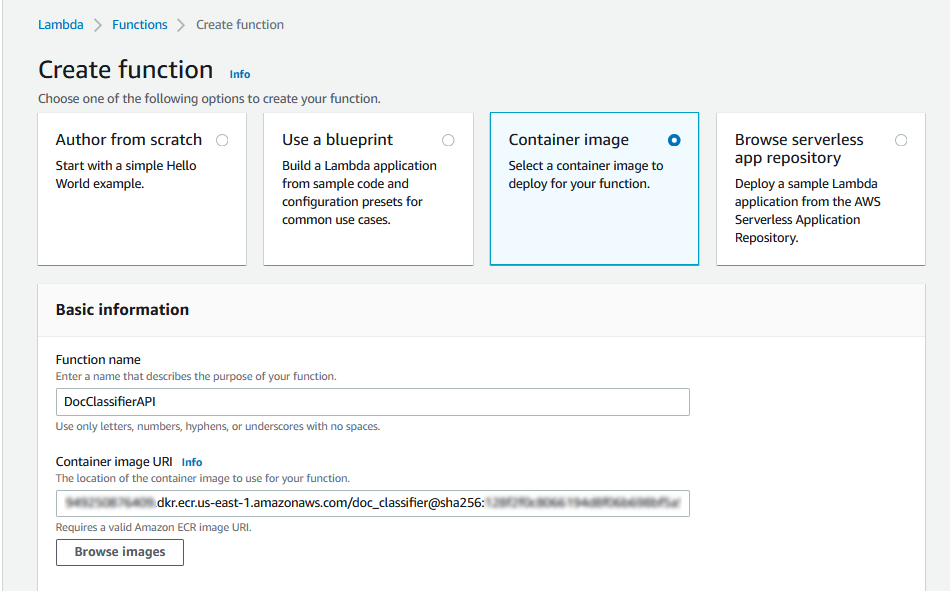
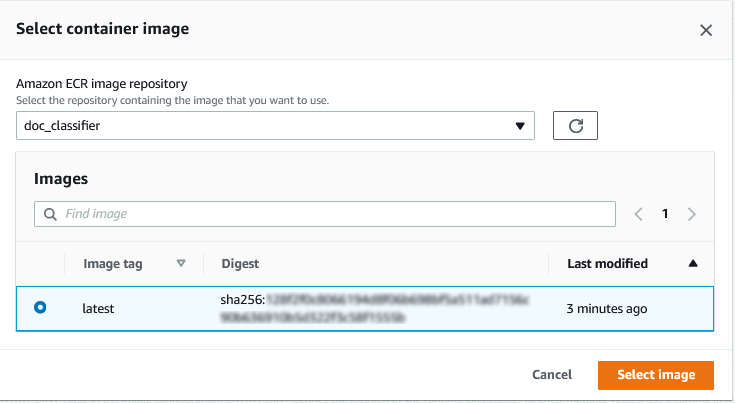
By selecting to create the lambda function with a container, the container can be selected in the “browse images” button.
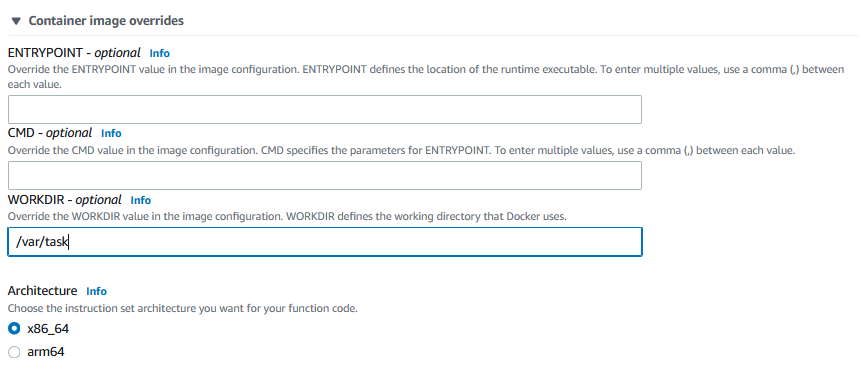
Under “Container image overrides” the variable “/var/task” shall be set in the WORKDIR box.
Finish the creation step by clicking in the “create function” button. Since the model consumes some memory, we must increase the memory and the timeout limit of the lambda function.
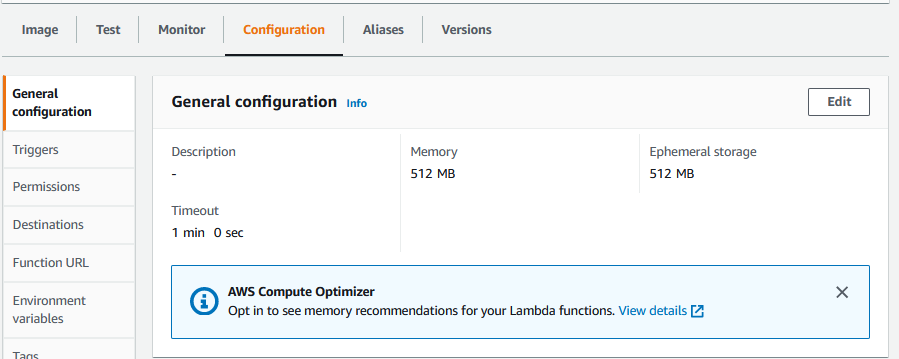
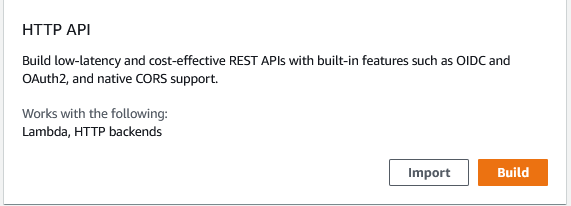
The last step is to set the API Gateway as a trigger so we can call our model with a HTTP request. By searching by “API Gateway” in AWS search bar and clicking in API, we can select to create a new one and to create a HTTP API:
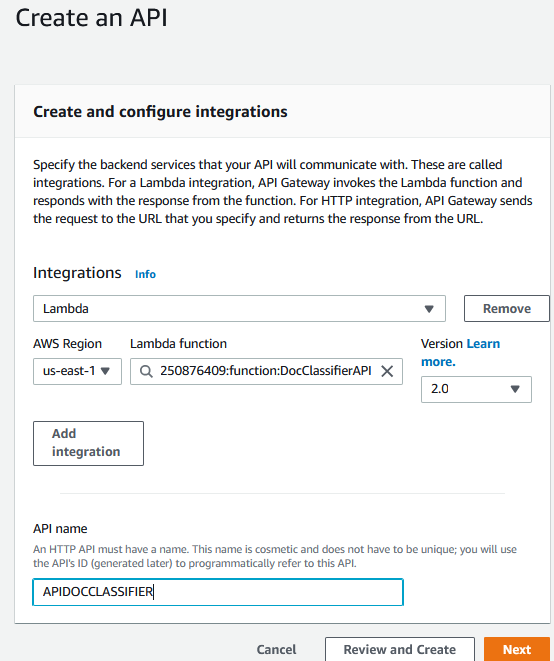
The API can now be integrated it with the Lambda function created earlier:
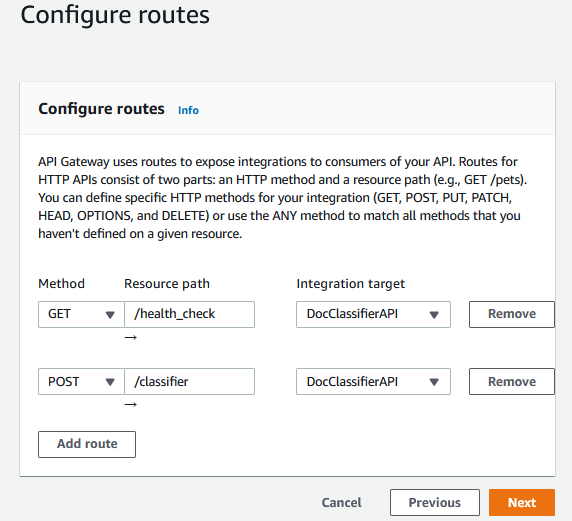
The last step is to map the routes of the API Gateway to the routes of the API inside the Lambda function:
And that’s it. By finishing the creation and going back to the lambda function screen, we shall see the following screen:
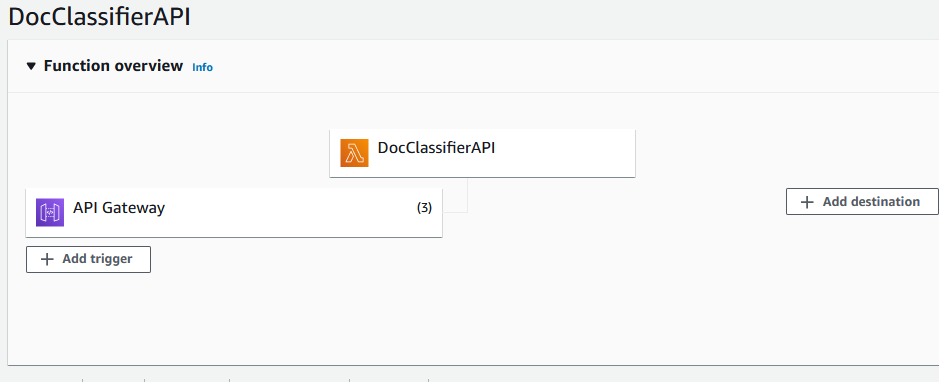
The routes we created are now related to a URL:
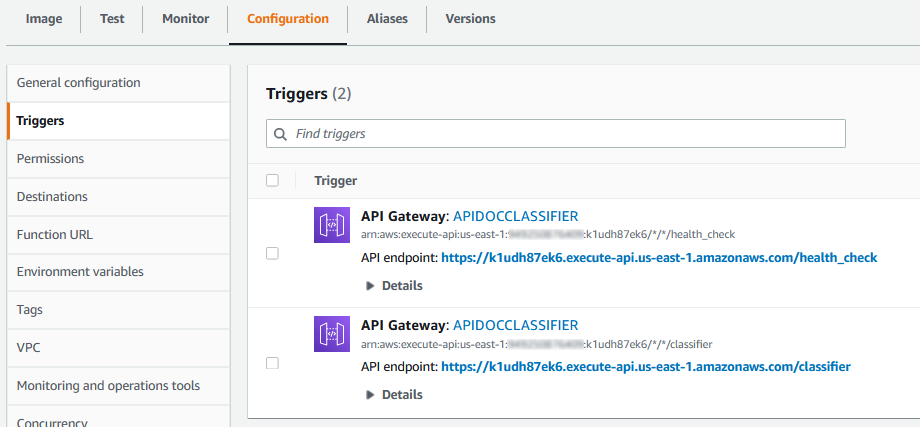
So now our function can receive HTTP requests in those URLS. Using the following code to test:
We shall receive the following response:

That’s it. Our model can know give predictions to photos, everything in the cloud. Feel free to comment, explore the code on Github or contact me via LinkedIn. Keep on learning :D
References
[1] BID Dataset: a challenge dataset for document processing tasks. https://sol.sbc.org.br/index.php/sibgrapi_estendido/article/view/12997
[2] Selfie-Image-Detection-Dataset. https://www.kaggle.com/datasets/jigrubhatt/selfieimagedetectiondataset
[3] Creating Lambda container images. https://docs.aws.amazon.com/lambda/latest/dg/images-create.html
[4] How to run AWS Lambda on your computer using Docker containers. https://medium.com/dataengineerbr/how-to-run-aws-lambda-locally-on-your-computer-with-docker-containers-533a3add1b45
